At this point, you should have your Pixel copied and ready to add to your Wix site. If not, click here, then come back.
Log onto your Wix account. Choose the domain you want to add the code to. On the left side of your screen is the menu. Scroll down to “Settings > Advanced Settings > Tracking Tools”.
On the top right, click “New Tool”, and select “Custom”.
Your screen should look like this:
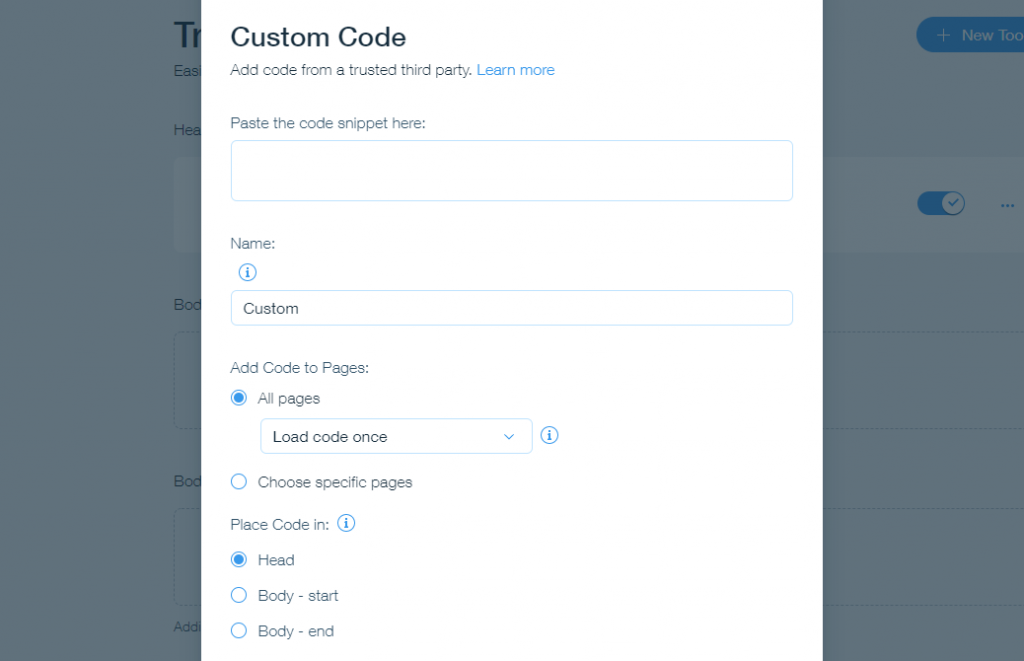
Now paste your Pixel code snippet where it says “Paste code snippet here”.
Give your Custom Code a name, like UX Optics Heatmap Tracker.
Select “All Pages”. Then, when you add new pages to your website, the UX Optics code will automatically be added to them.
Note: You have specified “All Pages” for Wix to read this code. However, UX Optics reads every page as well and knows which pages to track and which pages to leave out.
For “Paste Code in”, make sure to choose “Head”. This is how the UX Optics app finds the pages you want to track.
Then, at the bottom of the box, choose “Apply”. (It’s not shown in the picture above, but we promise it’s there.)
And that’s that.