Installing UX Optics is a copy-paste scenario, so it’s pretty much impossible to mess up anything about your website. It’s the thing making you money, so you’ll want to keep that intact.
Once you sign up for a plan, you’ll get an activation link verifying your email. Click on that, and you’ll be taken directly to the app. It will look like this:

Step 1: Adding your domain information.
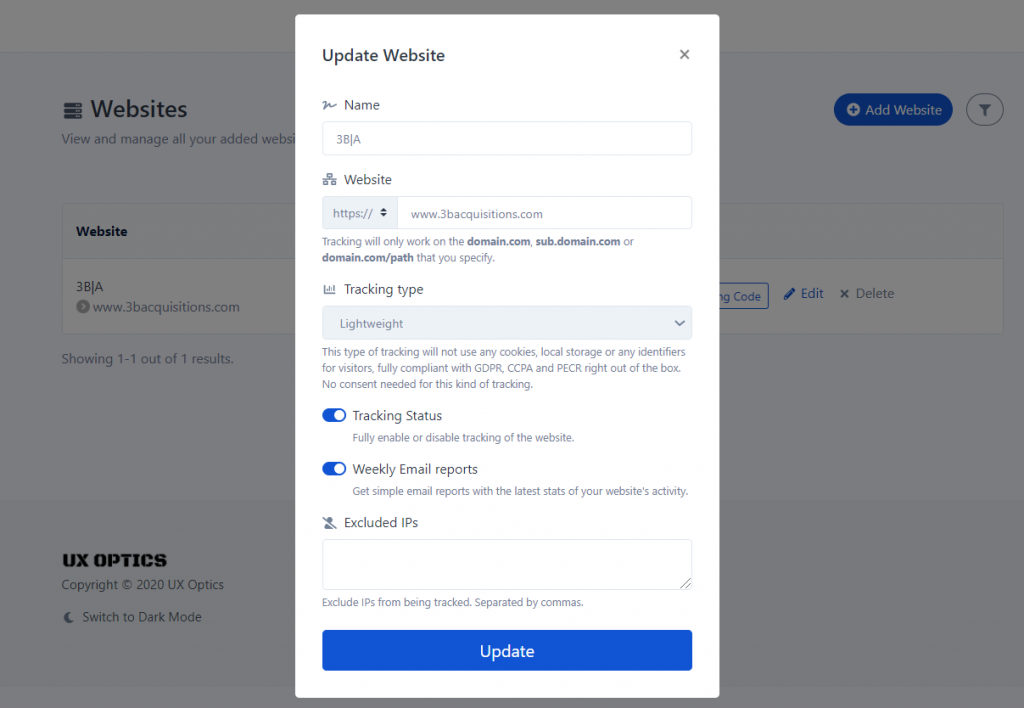
To add UX Optics to your website, click “Add Website” in the top right-hand corner. The pop-up box will prompt you to put the name of your “website in. Then it asks for your website URL.
Note that you can choose what exactly gets tracked. If you enter your homepage URL (www.yourdomain.com), then everywhere page that starts with www.yourdomain.com can be tracked. For example, www.yourdomain.com/shop will be tracked.
However, if you specify one specific path, every page starting with this path will be tracked. For example, www.yourdomain.com/shop/fall2020 will be tracked, while your homepage, www.yourdomain.com will not. If you have very specific pages you want to track, this is how you would specify those pages.
Websites that are formatted as sub.domain.com are pages that start with “app”, “blog”, “shop”, etc. Subdomains are additional information added to the beginning of a domain name to separate and organize content for a specific function (such as an app or a store) from the rest of your website.
For example, UX Optics uses app.uxoptics.com to specify our cloud-based app, and separate it from the main site.
If you want to track a specific section of your website (if you have specified a subdomain in this way) then you can add UX Optics to pages starting with your subdomain name.
You can choose between lightweight tracking and normal tracking. There are advantages and disadvantages to both of these choices.
Lightweight tracking shows you an overall heatmap of your site’s pages. You do not require any user permissions to use UX Optics in this instance. But you will not get as much information as when you use normal tracking to gather pointed experiences from specific users.
Normal tracking has more to do with tracking specific visitors, which requires the usage of cookies, local storage, and unique random identifiers. This means that visitors must accept cookies for UX Optics to track specific visitors.
It has the advantage of being able to monitor specific users, both new and recurring ones. You can track events like clicks, form submissions, page resizing, and scrolls. You can also replay sessions to visually understand the user experience. Enabling these events gives you access to a rich amount of information about your site pages.
However, users do have to accept cookies, which is irritating to some users. Normal tracking is also “heavier” for your site to carry, meaning that it may take your site longer to load than if you use lightweight tracking. It’s much like hiking: You can travel lightly and move faster. But you cannot carry as much.
In both instances, you may choose to receive weekly email reports concerning site activity.
Click “Submit”.
After that, you should see a line of code like this:
This is your Pixel, a line of tracking code that you will install on your website to connect UX Optics to your website.